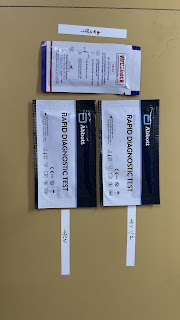
LABORATORY TESTS
1) MICROBIOLOGY :
SEROLOGY :
HIV RAPID TEST -
Procedure :
Add 20 microliter of drawn blood specimen with a 20 microliter capillary pipette into the sample well. OR
Add 10 microliter of serum into the sample well —-
Add 4 drops of assay diluent into sample well
Interpretation:
Read the result in 10-20 mins
NEGATIVE : the presence of only control line (C) within the result window indicates negative result
POSITIVE: * the presence of 2 lines as control line (c) and test line (l) with in the result window indicates result for HIV - 1
* The presence of 2 lines as control line (C) and test line (2) with in the result window indicates result for HIV - 2
* the presence of 3 lines as control line (C) , test line (1) and test line (2) with in the result window indicates a positive result for HIV - 1 & HIV - 2
Invalid : no presence of control line (C) within result window indicates invalid result
HBs AG RAPID TEST :
Procedure:
Add 100 micro liter of serum into sample well using a micropipette OR Using a disposable dropper , take serum — Add 3-4 drops of serum or plasma into the sample well
Interpretation:
Interpret test result in 20 mins after adding specimen
NEGATIVE: Appearance of only control band
POSITIVE: Appearance of both control and test band
INVALID : No appearance of any band after sample addition OR appearance of only test band
HCV RAPID TEST :
Procedure:
Add 10 microliter of serum , into the sample well using micropipette — Add 4 drops of assay diluent into the sample well — OR Using a capillary pipette , take 10 microliter of serum and add into the sample well
Interpretation:
Interpret the results in 15-20 mins after adding assay diluent
NEGATIVE : Appearance of only control band
POSITIVE: Appearance pf both control and test band
INVALID : No appearance of any band after sample addition OR appearance of only test band
DENGUE TESTING:
- NS 1 , IgM, IgG
Add 70 microliter of serum with dropper to the sample well antigen device ( NS1 ) — Add 10 microliter of serum with droppers to S well of the antibody device ( IgM,IgG ) and 2 drops of ( 70 microliter ) of buffer to the B well of the antibody device (IgM, IgG)
Interpretation:
Read the reaction at 20 mins . Positive results may appear as early as 2-10 mins. However negative results must be confirmed at 20 mins only
Interpretation of NS1 Ag :
REACTIVE : Appearance of pink coloured line , one in test region T and control region C that sample is non reactive for NS1 Ag
NON REACTIVE : Appearance of one distinct pink line on control region C only indicates that sample is non reactive for NS1 Ag
Invalid : neither control line nor the test line appears on membrane the it is invalid
Interpretation of IgM & IgG :
IgM & IgG reactive : Appearance of red coloured line in the control region C and test region , IgM region M & IgG region G indicates that the sample os reactive for both IgM & IgG
IgM reactive : Appearance of red coloured line in the control region C and test region , IgM region M indicates that the sample is reactive for IgM antibodies
IgG reactive : Appearance of red coloured line in the control region C and test region , IgG region G indicates that the sample is reactive for IgG antibodies
Non reactive : Appearance of one distinct red coloured line in the control region C with no line in the IgM & IgG indicates that the sample is non reactive
WIDAL TEST :
Procedure:
Take 7 clean dry tubes labelled from 1-6 as required ( one set for each antigen) — pipette 1.9 ml of isotonic saline in to tube no . 1 and 1 ml of isotonic saline in tubes 2-6 — to tube no. 1 of all sets add 0.1 ml of test serum to be tested and mix well — transfer 1 ml of diluted sample from tube no.1 to 2, 2 to 3 and mix well , continue this serial dilution up to tube no.6 . Discard 1 ml of diluted sample from tube no.6 of each set — tube no.7 in each set serves as antigen control — to all tubes of the respective sets add one drop of the respective antigen suspension and mix well. Cover and incubate at 37 degree Celsius for 16-20 hrs — look for agglutination
The tubes 1-7 will give 1:20, 1:40, 1:80, 1:160, 1:320 and 1:640 dilutions
Add 1 drop of respective antigens to all the tubes in each row
Interpretation:
TO > 1 in 80 dilution
TH > 1 in 160 dilution
2) PATHOLOGY :
MALARIA TESTING : 2 methods are being done in our laboratory
1) STRIP METHOD :
Take 5 microliter of blood add to well and then add 3-4 drops of buffer into the well and then wait for 10-15 mins , if there is appearance of only control band the test is NEGATIVE & if there is appearance of both test and control bands the test os POSITIVE
2) SMEAR METHOD :
Take the blood smear and airdry for 15 mins — add leishmans stain — after 30sec to 1 min add distilled water — wait for 20 mins — wash with running water — air dry for 10 to 15 mins — Examine under microscope for the malarial parasite forms
ESR TESTING :
A blood sample of 1.6 ml is taken in a black vacutainer ( in which sodium citrate 3.8 % is anticoagulant ) and shake it well — ESR pipette is kept in the vacutainer — donot disturb it for 1 hr — after 1 hr reading is taken — 10-15 mm of reading is taken as normal value
D DIMER TESTING:
A blood sample of 1.8 ml is taken in a blue vacutainer ( in which sodium citrate 3.2 % is anticoagulant ) and shake it well — centrifuge for 15 mins and serum is collected
* The sample in this test is serum
Take the vial , add R1 (140 microliter) & serum sample ( 12 microliter) — after 1 min — add R2 ( 70 microliter) — after 5 mins — take the reading, if for example x is the reading ; the D DIMER value of the sample will be x multiplied by 1000
CUE AND URINE FOR KETONES :
It is done in our college by strip method also known as DIPSTICK METHOD, there are 2 kinds of strips available in our college they are :
* The above strips are used to detect leucocytes, nitrates, urobilinogen, proteins, pH, Blood, Specific gravity, ketones, bilirubin, glucose ( 10 parameter dipstick ). These are used when the urine sample is relatively abnormal
* The presence & if present , the gradient of any parameter is indicated by the colour given on the box


Comments
Post a Comment